Thursday, January 30, 2014

Soooo Cute Infant Picture Outfit

SO I had an order requested for an outfit... While waiting to hear back from the person that wanted to order it I messaged my Mom to ask her what she thought... She said that she Wanted it... So while I wait I looked for the patterns and none of the picks had links..... First here is the pic that was sent to me.....

First I tackled the Shoes.... I wrote a pattern for some Mary Janes because nothing I found was quite what I wanted... You can see that free pattern HERE

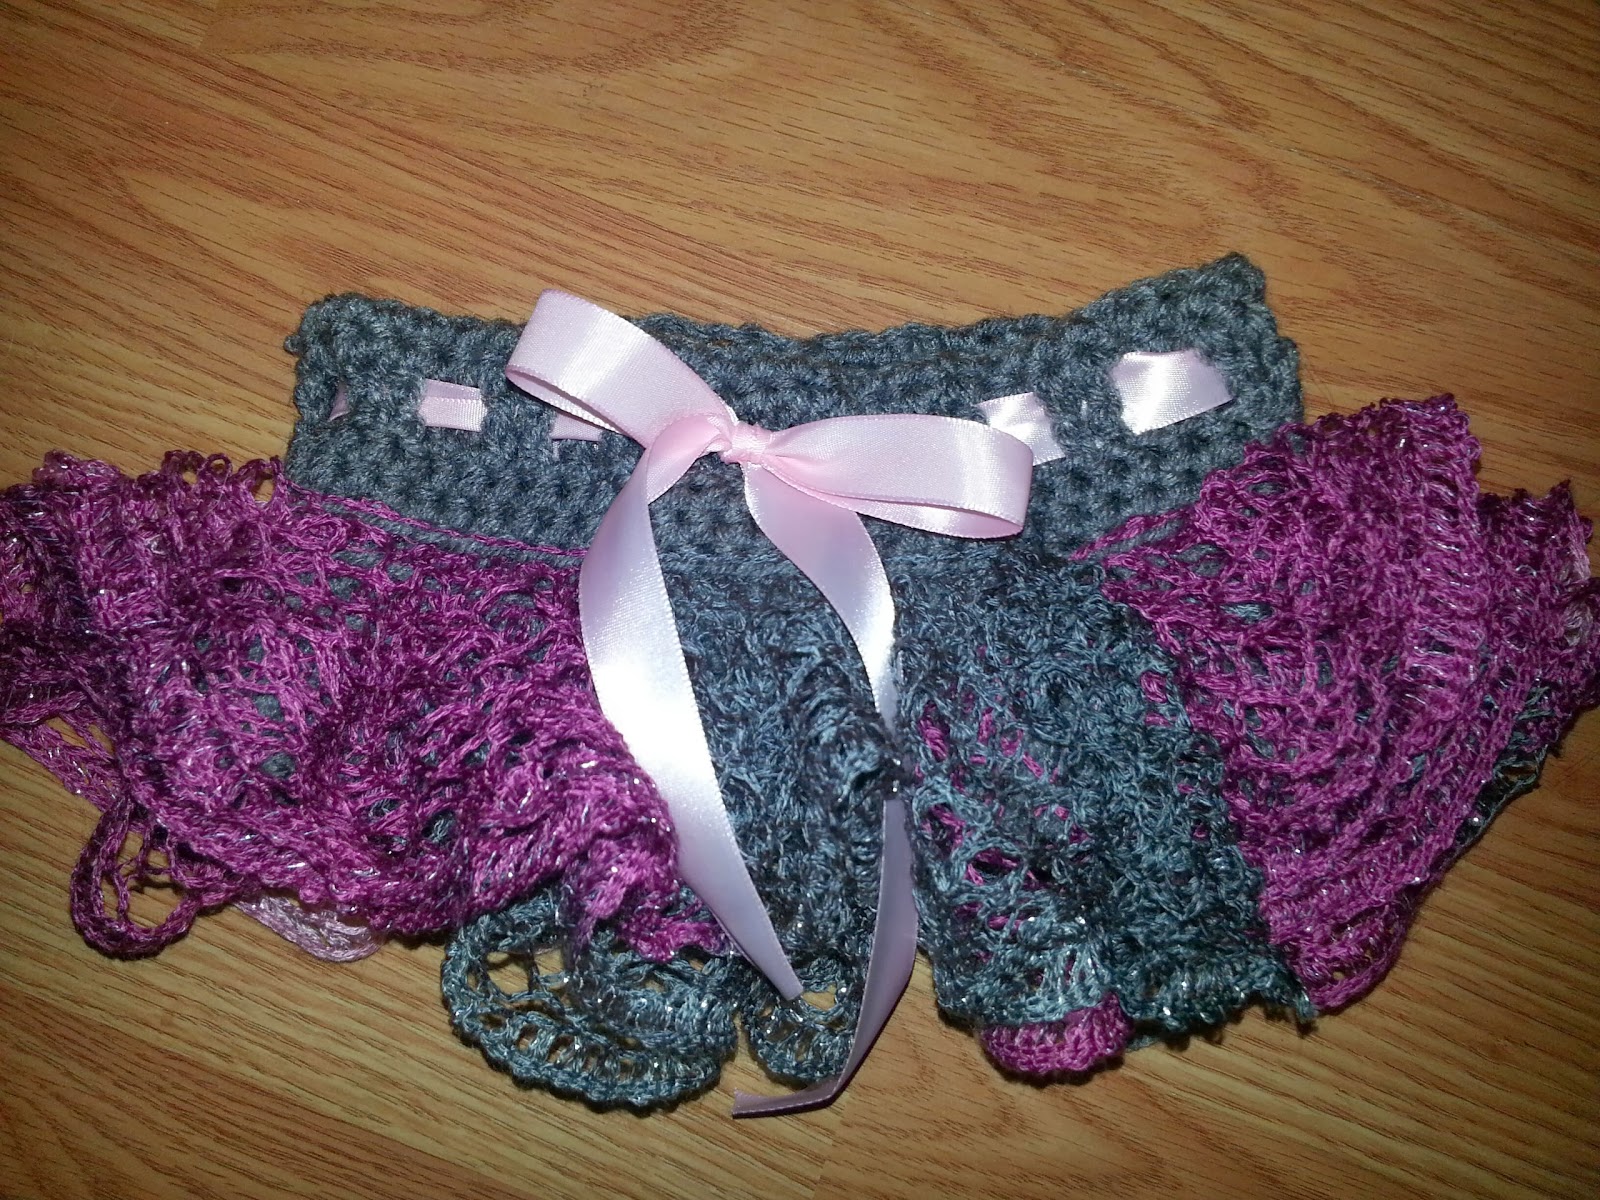
 Then came the Sashay Skirt.... I found a couple patterns for toddler sizes but nothing for an infant.. SO I wrote one.... And you can find the Free Pattern HERE
And then the Hat... I found a great website that has hats in all sizes... and that is the Crafter Chick.... You can see those HERE


Wednesday, January 29, 2014

Sashay Ruffle Skirt 6-12 month


 6-12 months


Round 1. sc in each stitch around, sl st. 60

Round 2. ch 3, triple crochet in each stitch

 around, sl st in beg chain. 60(this will be the 

ribbon belt loops)

Rounds 3-4. ch 1, sc in each stitch

 around, sl st. 60  *Repeat for next 

two 

rounds

Rounds 5-7. *ch 1, hdc in the back loops in 

each stitch around, sl st, 60*Repeat 

Round 8-9 ch2 (dc in nex t st, 2 dc in next 

st) Repeat around

Attach the Sashay yarn on front loops 

of rounds 5-7 

There is a great video on how to attach 

the sashay yarn at Amys Crochet

Crochet Mary Janes

0-3months
Coming Soon
3-6months
Coming Soon

6-12 months


Round 1: Ch12, 2 sc in the 2nd ch from hook, sc in the next 2 chs, hdc in the next 3 chs, dc in
the next 4 chs, 6 dc in the last ch, then working on the opposite side of starting ch, dc in the next
4 chs, hdc in the next 3 chs, sc in the next 2 chs, sc in the same ch as the 1st 2 sc of this round.
Join with sl st in the 1st sc.
Round 2: Ch 1, 2 sc in the 1st st, sc in the next 10 sts, 2 sc in each of the next 2 sts, sc in the
next sc, 2 sc in each of the next 2 sts, sc in the next 10 sts.2 sc in the next st, Sl st to ch 1 space to join.
Round 3: Ch 1, sc in the 1st , 2 sc in the next st, sc in the next 11sts, 2 hdc in each of the
next 2 sts, sc in the next 3 sts, 2 hdc in each of the next 2 sts, sc in the next 11 sts, 2 sc in the last
st. Sl st to ch 1 space to join.
*If you want a different color sole than top fasten off and attach now.
Round 4: Working in the back loops hdc in each st around , slip st to ch 1 to join.
Round 5:Ch 1, sc in next 14, hdc2tog, hdc in next 10 sts, hdc2tog, sc in next 10 sts, slip stitch to ch 1 to join
Round 6: Ch 1, sc in next 3 sts, sc2tog, sc in next 6 sts, hdc2tog, hdc in next st, (skip next st, dc
in next st) repeat parenthesis 4 times, skip next stitch, hdc in next stitch, hdc2tog, sc in next 6 sts,
sc2tog, sc in last 3 sts, sl st to ch 1 to join.
(Left) Round 7: Ch 1, sl st in each stitch around until you are 6 st from center front, ch 12, hdc in 3rd from end, hdc in next 9 st, sl st in remaining st. Sl st to ch 1 space to join.
(Right) Round 7: Ch 1, sl st in each stitch around tip until you are 4 st from center front, ch 12, hdc in 3rd from end, hdc in next 9 st, sl st in next st of bootie, sl st around until end. Sl st to ch 1 space to join.

Crochet cowboy hat


Skill Level:   Easy
Supplies: size G/4/4.25 mm crochet hook
Stitches Used: slst (slip stitch), sc (single crochet), hdc (half double crochet)

Premie= skip Rnd 5,  Rnd 6, and Rnd 7 (!)
Newborn = Skip Rnd 6 and Rnd 7 (#)
Infant = Skip Rnd 7 (*)
Toddler= As is  

.**************************************************************************************************************
Directions-
Rnd. 1: ch6, 2sc in 2nd ch from hook, sc in next 3 ch, 3sc in next ch, working in back loops of ch, sc in next 4 ch, join with slst to beginning sc, ch1, do not turn in this or following rnds.       12sc
Rnd. 2: sc in first sc, 2sc in next sc, sc in next 3 sc, 2sc in next sc, sc in next sc, 2sc in next sc, sc in next 3 sc, 2sc in next sc, join with slst to beginning sc, ch1.      16sc
Rnd. 3: sc in first sc, 2sc in next 2 sc, sc in next 3 sc, 2sc in next 2 sc, sc in next sc, 2sc in next 2 sc, sc in next 3 sc, 2sc in next 2 sc, join with slst to beginning sc, ch1.    24sc
Rnd. 4: sc in first 2 sc, 2sc in next 2 sc, sc in next 6 sc, 2sc in next 2 sc, sc in next 3 sc, 2sc in next 2 sc, sc in next 6 sc, 2sc in next 2 sc,sc in the next sc,  join with slst to beginning sc, ch1.    34sc
Rnd. 5: sc in first 3 sc, 2sc in next 2 sc, sc in next 8 sc, 2sc in next 2 sc, sc in next 3 sc, 2sc in next 2 sc, sc in next 8 sc, 2sc in next 2 sc,sc in the next sc,  join with slst to beginning sc, ch1.    38sc
Rnd. 6: sc in first 2 sc, 2sc in next 2 sc, sc in next 10 sc, 2sc in next 2 sc, sc in next 5 sc, 2sc in next 2 sc, sc in next 10 sc, 2sc in next 2 sc,sc in the next 3 sc,  join with slst to beginning sc, ch1.    48sc
Rnd. 7: sc in first 3 sc, 2sc in next 2 sc, sc in next 12 sc, 2sc in next 2 sc, sc in next 7 sc, 2sc in next 2 sc, sc in next 8 sc, 2sc in next 2 sc,sc in the next 4 sc,  join with slst to beginning sc, ch1.    52sc
Rnd 8: working in back loops sc in each sc around, join with slst to beginning sc, ch1  52sc (*48sc)(#38Sc)(!34sc)
Rnd 9:sc in each sc around join with slst to beginning sc, ch1 52sc (*48sc)(#38Sc)(!34sc)
Rnd 10 & Rnd 11:sc in next 7 sc (*5sc)(#5sc)(!4sc), hdc in next 8sc (*7 sc)(#5sc)(!4sc), sc in next 18sc (*17sc)(#14sc)(12!sc), hdc in next 8 sc (*7 sc)(#5sc)(!4sc),  sc in next 11 sc (*12 sc)(#9sc)(!8sc)join with slst to beginning sc, ch1          52sc (*48sc)(#38Sc)(!34sc)
Rnd 12-16: sc in each sc around join with slst to beginning sc, ch1  52sc (*48sc)(#38Sc)(!34sc)
Rnd 17:Working in front loops only this round <sc in next 2 sc, 2sc in next sc> around. 70sc  (*66sc) (#52sc) (!48sc)
Rnd 18: sc in next sc until you reach the corner <you can find the corner by folding the piece from center like shown below>, 2sc in next 2 sc, sc in next sc until corner, 2sc in next 2 sc, sc in next sc until corner, 2sc in next 2 sc, sc in next sc until corner, 2sc in next 2 sc, sc in next sc until reaching begining of row, join with slst to beginning sc, ch1       78sc (*74sc)(#60sc)(!56sc)  


HINT: make the sides even so on the infant one I am making I made the sides (ex. 18 lng side and 11 shrt side 8 each corner) this made the continuous  rounded rectangle.... as shown below


Rnd 19: sc in each sc around, join with slst to beginning sc ch 1 78sc (*74sc)(#60sc)(!56sc) 
Rnd 20: Sc in each sc until you reach the corner,2sc in next 2sc, sc in next sc until corner, 2sc in next 2 sc, sc in next sc until corner, 2sc in next 2 sc, sc in next sc until corner, 2sc in next 2 sc, sc in next sc until reaching beginning of row, join with slst to beginning sc, ch1       86sc (*82sc)(#68sc)(!64sc)  
Rnd 21 & 22: sc in each sc around, join with slst to beginning sc ch 1 86sc (*82sc)(#68sc)(!64sc)  
Rnd 23: turn,sc in each sc around, join with slst to beginning sc ch 1 86sc (*82sc)(#68sc)(!64sc)
Rnd 24 & 25: sc in each sc around, join with slst to beginning sc ch 1 86sc (*82sc)(#68sc)(!64sc) 


Tuesday, January 28, 2014

Littlest Cowboy

I was requested to make an outfit for future nephew Charles Michael and of course there was a picture of an etsy item attached. 

After scouring the Internet for the pattern I realized that there is not a pattern exactly what she wanted yet alone one that included all the pieces she wanted soooo... I found several sites and then morphed the patterns to resemble the product she wanted.... First off was the chaps ...... I used the pattern from 
Busting Stitches...here


But I did not add the stars to the chaps and I added 2 more rounds around the outer edges of sc to add the light accent.

*To make the "belt" Sl in corner of waist, chain 27 turn sc in 2nd st from hook, sc in remaining 24 stitches, sl in corner, fasten off.


I also made the bonus Diaper cover and suspenders... I added buttons on the inside so the suspenders can be detached from the diaper cover.. Complete with 2 Black walnut buttons that my Grandpa Pete made from our tree when I was little..


Here is what MY interpretation (including my sisters wants/vision)........ 


I then found the boots at Hodge Podge Crochet here


So I followed the pattern for the sole of the boot and it 

worked like a charm but kinda got confused by the boot part

 so I watched the 2nd video and followed it exactly the way it

 showed but it didn't work... SO I followed the 3rd video and it

 turned out perfect... I also added the spurs. 


Make a slip loop (sc3, sc in last sc, ch2, sc in center 

loop)Repeat 4 times to make a 5 point star. Fasten off.


Ch 28 slip both the working yarn and the loop through the 

center loop of the star. turn, skip 2 sc, hdc in next 7 sc, Pull 

yarn and hook back through star, hdc the in the next 7 sc, 

sc in next stitch, ch 10, 


slip stitch the 2 chains and 

the end of the HDC

. Slide over boot, under heal  

and around back.


Here is a picture of the boots.


Saturday, January 25, 2014

Cherry chip cowl

Row 1: chain 232 stitches , slip stitch together
Row 2: chain 1, single chain in each stitch slip stitch together
Row 3: ( chain 5 skip 3 single crochet single crochet and next single crochet) repeat around 57 times, slip stitch to end **make sure there are no twist in the design
Row 4 through 9: repeat Row 3
Row 10: ( chain 5 skipped 3 crochet single crochet and next single crochet) repeat 15 times
Row 11: turn slip stitch in the next 3 single crochets ( chain 5 single crochet in center of next  5 chain section) repeat 13 times
Rows 12 through 23 repeat Row 11 decreasing by one -5 chain section - until there is one 5 chain loop
Row 24 (sc, hdc, dc, hdc, sc) in five chain section..... repeat around entire outside of cowl (72 times)
Fringe cut 144 12 inch strips apply to strip to every other double crochet around outer trim of scarf

Friday, January 24, 2014

A NEW Double Wide Trailer....

OK so when I moved in with my husband I moved into a double wide broken down trailer..... With a smoker, police officer, that loved inside cats and had no since of smell   BACHELOR.... that should say enough.... Well through the last 6 years alot has happened in that trailer we have had up to 13 people living with us,and had house fire,  ... BUT through everything it has stood even though I had never quite felt like it was home.... I moved to my sisters for almost a year to take care of my 2 foster daughters ... She and her husband graciously welcomed us into their home and hearts when we did not have enough room in ours.... Well upon return to my house we have been holding onto the dream of the NEW house that is being built with our own sweat love and tears....As I say often that house is moving at goverment speed so I needed to make the old white trash trailer our own..... I did not take before pictures but if you have any questions about how we did something just email me... Here are my brag pictures of my HOME and yes it is now where my heart is.....