Friday, January 15, 2021

Hard Foam Koozie Upcycle

Hey all, 

My sister asked me to purchase some koozies so we could customize them and give them away at the Local blood drive she organizes. Welp little to say it was a flop vinyl that did not stick and paint that scratched off, hate to say it but we moved forward with shirts and placed the koozies in storage. 


Fast forward to cleaning out storage and I stumbled upon those koozies and wondered if I could update them to be able to be used at a Renaissance fair. IT was a long path but this is what I cam up with 


Pretty Cool right 
The supplies you need are: 
A can of Flex All Sealent
A wood burner
A sheet of Craft Foam
Contact Cement
Cosplay foam Paint
Air Brush (if you have)

The first thing I did was burn the design into the koozie. As you can see I worked on mermaid and dragon scales and wood planks. WARNING: please be sure to complete this part outside in a well-ventlilated area while wearing your PPE as the smoke is pretty fierce and you house will smell for days. 

I then sprayed each wood plank koozie with flex all and each mermaid with clear foam primer (also in the cosplay area)and hung to dry
Once dry take your cosplay foam paint and decorate the koozie. I found that an airbrush was great for this as it kept the layers of paint very thin and allowed for easy shadowing.


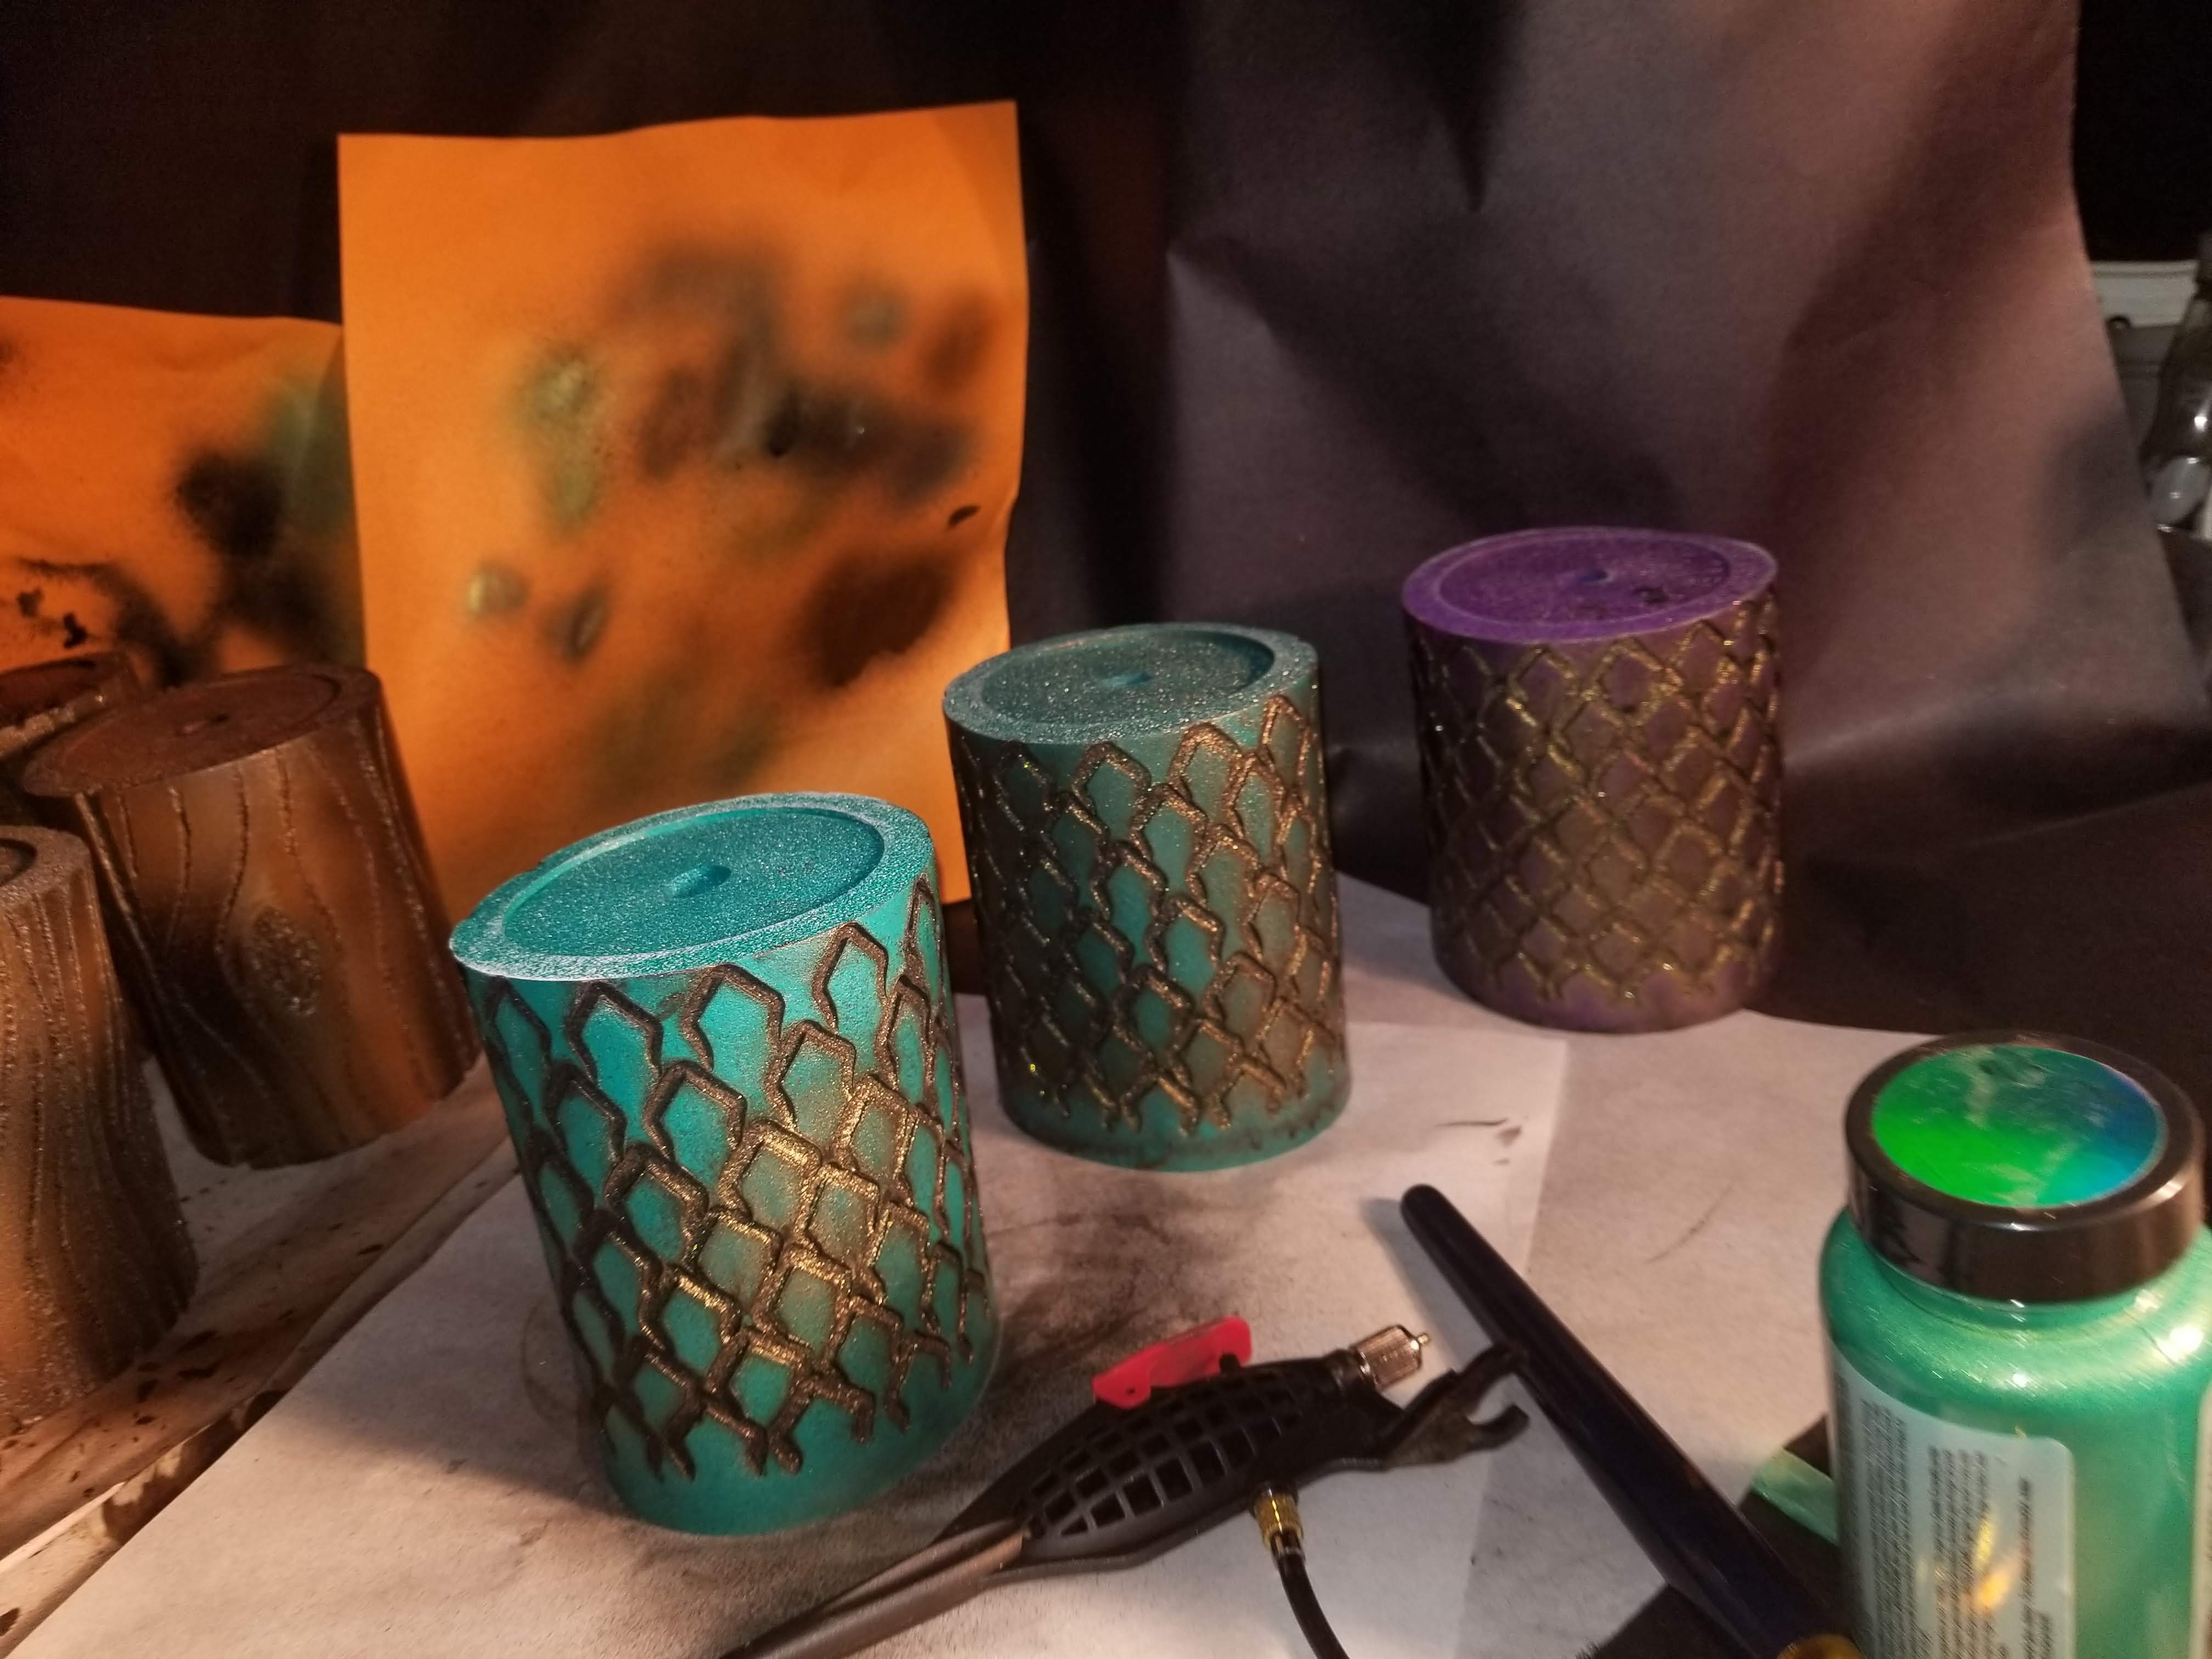
For the koozies below I did not coat with Flex All prior to painting but in the end, I did not like the smooth finish they ended up with. 
I then cut narrow strips of craft foam and hole punched some small circles and painted them silver. I attached them with contact cement to the wood plank koozies to look like metal.
Don't Mind the TV playing in the background of the videos it was a late-night


As you can see I only used colors I wanted to come through for the dragon and mermaid scales koozies so I did not have to completely cover I just added accent color shift paint. 


Thursday, December 10, 2015

Super easy crocheted Fingerless gloves

Chain 30 slip knot together
1. Turn Double crochet in 2nd stich from hook. DC in each stitch slip stich together(28)
2. Chain 3 *front double crochet 3 times on the 3rd DC from hook, skip 1 stitch DC in next stitch * repeat 6 times until all the way around. Slip stitch together
3. Chain 3 and Front double crochet on same single crochet twice (3 stitiches). Skip 1 stitch and DC in next stitch ( center of 3 stitch cluster from row 2) repeat 6 times until around. Slip stitch together
4-8. repeat  alternating rows 2 and 3
9. slip stich 2 stitches until you reach center stitch of a 3 stitch cluster in row 8 chain 8 skip 4 stitches and slip stitch into the center stitch of the next 3 stitch cluster (thumb slot)  Chain 3 *front double crochet 3 times on the 3rd DC from hook, skip 1 stitch DC in next stitch * repeat 5 times until all the way around. Slip stitch together
10. Chain 3 Front double crochet on same single crochet twice (3 stitiches) DC in thumb loop, 3 front dc in next DC outside of thumb loop,  Chain 3 *front double crochet 3 times on the 3rd DC from hook, skip 1 stitch DC in next stitch * repeat 5 times until all the way around. Slip stitch together
11.Chain 3 *front double crochet 3 times on the 3rd DC from hook, skip 1 stitch DC in next stitch * repeat 6 times until all the way around. Slip stitch together
12. HTC in each stitch around
13. Make a fan in each hdc tie off
14. Attach to bottom and repeat rows 12 and 13

Enjoy

Thursday, November 27, 2014

Wednesday, March 26, 2014

Skinny Jeans and Winter Dress... Trash or Treasure

So when "H" came to stay with us she had outgrown most of the cloths that came with her.... (as most 13-14 yr olds do).. As we were sorting through the cloths keep, give away, throw away.. Nothing was going in the throw away or the give away just into the Keep... Hmmm so I asked why are you keeping all those??? What are you going to do with them??? Do they fit you anymore??? The answers were I do not know what I am going to do with it but I like it and I do not want anyone else to have it.. (once again as most 13-14 yr old say) so became a 4th option I like but I am not attached to it/ Meaning Aunt Cheryl can cut it up. 1st pair of jeans became a cute skirt that I used some fabric from a crib sheet to complete. 2nd Pair of jeans and a tight winter knit dress .......


 1st we cut off the skirt off the dress leaving about an inch and a half. We also removed the arms by cutting at an angle from armpit out and up. We then Lettuce stitched the edges of the arms and the bottom of the shirt. 


We then cut the legs off the jean right above the crotch line and added the skirt(after gathering it to fit) to the bottom of the jeans. I we took the legs and sleeves of the pieces and cut them to make folded roses to accent the skirt

We also made a couple extra roses and attached them to a piece of denim and elastic to make a decorative Rose headband.
 Here is our final Product... Little to say "H" is very very happy with it and cant wait for school in the morning so she can wear it.

Monday, March 10, 2014

Grandbabies special spot

Owl Diaper cake


This is one of the cutest diaper cakes that I have ever seen..... So of course I had to make one... I chose to make all the items used in this cake but you could also purchase them.... I used 1-Receiving Blanket, 45 Newborn Diapers, Bib, Kimono Slippers, 2 Hair Clippies, Baby Wash Cloth, and a spool of ribbon... 

To make the Body I place the diapers in a Round Tupperware Container like the spokes on a bike tire... I then placed a ribbon around then and pulled tight. For the Eyes I took 6 diapers and rolled them together adding the next diaper right before I came to the end of the last and then tied off with a ribbon. I placed the Wash cloth and the Bib on top of the body and then placed the 2 eyes on top and secured all of them with a ribbon. I then Placed the receiving blanket over the head and secured it by wrapping a ribbon around the owls neck under the bib. The towel makes the owls wings. I then placed the kimono shoes into the ribbon on the bottom of the body. I hooked the Clippies to 2 bobby pins and pushed them into the middle of each eye

And here you go.. My first attempt at an Owl Diaper Cake.

Kimono shoes and Bib

Aren't these so cute???? Well I did not have to make the pattern for these but let me tell you they were sooo simple I can not believe it... I think it took longer to wait on my embroidery machine to embroider the bib then it took to make both the bib and the shoes.... You can find the bib pattern Here at Craft Passion but I think next time I am going to make it a little bigger. the size is perfect for a new born but to small for an older child. You can find the Kimono Shoe Pattern Here at Butter Cream Sewing Machine. I would love to make bigger ones also.As you can see I used these on my Owl Diaper Cake