Friday, January 24, 2014

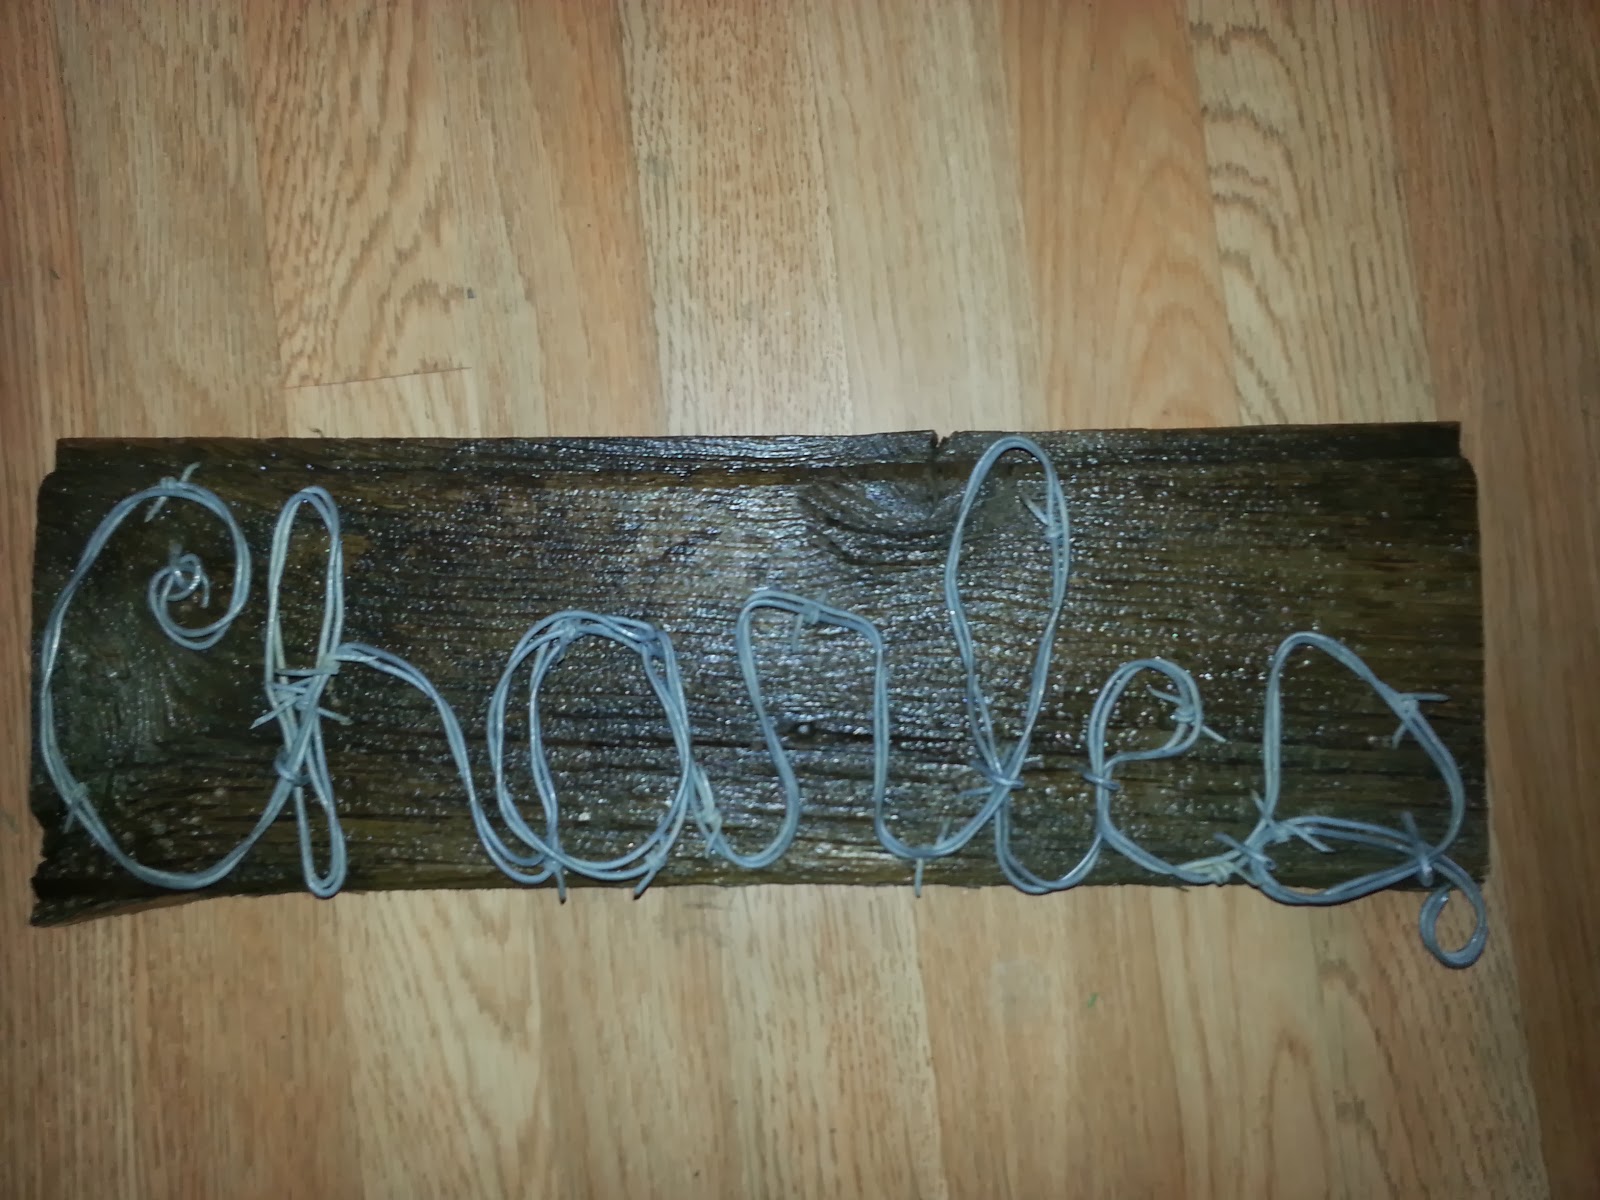
Barb Wire Name Wall Decor

Since it took Chrystal almost 9 years to get pregnant she has been planning and shopping for a long time... She had picked out several different Wall Decor that used the Baby's name but loved the ones made out of twine and barbed wire..... BUT she couldn't find what she wanted exactly so with less than 5 weeks to go I set out to make her something.... I used an old piece of barn wood and hand bent the barbed wire to form his name.... The original board actually was one piece but as wood does sometimes it had a mind of its own and split so now she has 2 boards that she can arrange any way she wants .. Here is the final product


Western Bassinet

Well Like I said earlier my life has definitely been an adventure lately.... on the day that we found out that my sister Chrystal was not going to be able to adopt Zarah she found out that after almost 10 years of trying she was pregnant. Little to say she is the baby and gets anything she wants .... So in the past few months I have been really busy Making Making Making...... First thing is her bassinet as you can tell little Charles Micheal is going to have a cowboy themed nursery... I was given this bassinet from my Bonus daughter #3 after she was given it to her by her aunt, after she was given it to her by her friend. So if I could make it work this would be the 4th baby to use it...

I almost through it out BUT once I started taking it apart I realized what a great bed it was... It can be raised and lowed and will rock or have wheels... It also has one side that goes down so you can put it next to your bed and reach in...... Great little bassinet.. All I did was seam rip off each part and replace it with some material that my sister had got from a thrift store and some jeans that I salvaged... And here you go 


New life to Old Boots...

Well in addition to all the other changes we now have a 14 year old foster daughter and he name is "Emma" (confidentiality you know).. So Emma has never lived on a farm and is doing pretty good... BUT she definently did not come prepared for the Farm/Recycled Life.... 

When we get a new Bonus child we always go shopping.. This way they have a choice in what they have in their rooms, what they wear, and what we eat.... Hoping to help them feel like they belong... So now to the topic at hand ... We were at Good will looking for some items for my Baby sisters baby shower and "Emma" spotted a pair of cowboy boots. She was SO excited when I told her we could get them because the baby shower theme was western ... BUT low and behold after doing a fashion show for the family she went out to feed the animals and the skin of the boots fell apart. While she was ok with getting a new pair she was so disappointing

that her first cowgirl boots EVER needed to go.....


Then I thought I can do something about this.... 
So first I covered the toes..... Making a flap on each side
I then cut off each flap to seal it
I then worked around the the side and used the point of the scissors to cut at the sole of the boot
On "Emmas" Boots there was a decorative seam 3/4 of the way down the boot. I then worked around the edge and cut the tape at the seam on the 3/4 mark of the boot


I changed the color of the tape and and worked my way up from the seam. 
When I got to the loops on top I took one strip the length of the boot loop and applied it. I then cut across at the old seam (on each end) 


and flip the tape into the center of the loop 

 I then place the next horizontal piece of tape on the boot and where it over lapped the loop I just cut down the middle and then across each way and flipped it under the loop

Then I took a strip cut length wise to the width of the space reaming and pulled it through the loop and flipped it over the top of the boot 


And there you go Duct Tape Boots

MIA

Sorry To be gone for so Long.....
Ok so just an update on my life..... I have remodeled my burnt double wide trailer... Moved back to my house.. My 14 year old son moved home... My 3 year and 14 month old foster daughters were placed with their fathers.... My Baby sister is pregnant,..... and my Sister, niece, stepdad, and mom have moved back from Europe so now we are only divided by a country..... AND we have started building our Home....

So lots of changes and lots of pictures to come...

Thursday, July 25, 2013

Facebook Adventure.....


Hello to Everyone...

 I am not sure if any reads the ramblings I am posting BUT at least I know my mom and my sisters do...LOL ... I am part of several groups on Facebook and noticed one day that someone was asking about a craft group.... Upon mentioning that I used to have Craft get together s (before 2 house fires, 3 births of grandkids, moving in with baby sister, gaining custody of 2 babies, starting a business, and 4 spouse strokes within the last 3 years just to name a few adventures) and people just seemed to respond... I LOVE Pinterest, don't get me wrong but I really like the idea of having a more interactive medium to "Talk Shop" Sooooo I creadted a group.. Crafters Corner.... I love it already we have over 300 members in under 15 hours and people seem to be responding...
I have put a challenge out there to everyone in Facebook land I would love for us as a collaborative group to Find new lives and loves in 100 different items in the next month.... So that means 100 items by 8/25/2013,,,Lets see if we can do this. I will document the items and the progress on this Blog as we go.

Saturday, June 22, 2013

Canning Plums

As of last November I have been staying with my baby sister on her little farm. Other than being 40 mins away from my husband I have loved it. Well I guess this year is the first year since she bought her house that her plum tree has really produced and when I say produced I mean the branches look like they are going to break... So we are canning them as they come off the tree to save for later in the year.

1. Rinse and cut off the pit


 2. Firm pack Fruit in Jar of Choice


 3. Make a simple syrup by combinding 2cups water with 1 cup sugar in a pot 


4. Bring to a boil until all sugar is dissolved and the mixture is clear


 5. Pour simple syrup into each jar.


6. Use a knife to remove any air from inside jars 


7. Clean the tops of each jar with a clean towel


 8. Prepare the lids according to box


9. Place lid and ring on and hand tighten


10. Place into a pot with water that is at least 1in over the top of the jars 
and bring to boil. Boil for 15 mins. Remove jars and allow to cool.


Aaron's Lo-Carb 1-pan Dinner

So my youngest son is 13 years old and 6 ft. 1 in. and has decided that he needs be eat a little healthier. So we decided that he can cook more often to help out. and so was born the first of many of Aaron's dishes. We will document all dishes here including the good, the bad and the ugly.

Here you go......1. Heat about 2 tbls of oil in a skillet (we use pure garlic infused olive oil)

2.Add about 1 cup of sauteed onions (we used some that we cooked last night on the BBQ)


3. Add about 2 tbls of minced Garlic


4.Once the onions and garlic are cooked add about 1Lb of very lean beef (we raise our own beef)


5. We added about 2 tsp of coarse ground black pepper (we love black pepper)


6. And 3 tbls. of Creole Seasoning


7. Chop up ground beef while browning


8. Add 2Tbls. Worcestershire Sauce and cook until browned


9. Add 1 can drained corn and 1 can drained green beans


10. Cook until all ingredients are mixed and hot


 11. Hot and Bubbly Yum Yum.... And mama didn't have to cook....


This could be served on a bed of rice with soy sauce but Aaron said " No mom that would add to many carbs so I ate mine with some sauteed squash.....